A specialist Sub-DPS who operates entirely off-turn. Moze marks a single enemy as Prey, then unleashes relentless follow-up attacks every time his allies strike the target. His Departed state makes him invisible on the field while he stacks damage, a perfect fit for any follow-up attack team.
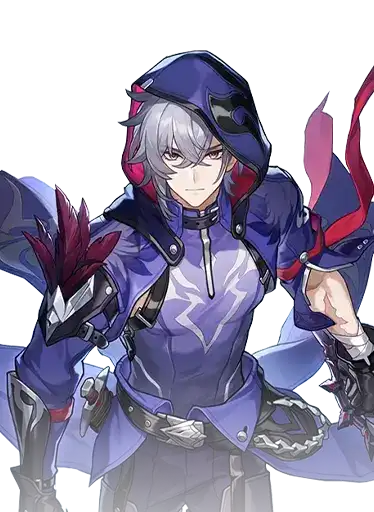
Moze
Lightning / The HuntSkills
Deals Lightning DMG equal to 50% of Moze's ATK to a single target enemy. Rarely used in practice since the Skill almost always takes priority, but provides a fallback option when no other allies are present and Prey cannot be placed.
Marks a designated single enemy target as "Prey" and deals Lightning DMG equal to 75% of Moze's ATK, then gains 9 points of Charge. Prey is required for the Talent to activate. Cannot be used when no other combat-capable allies are on the field.
Deals Lightning DMG equal to 162% of Moze's ATK to a single target enemy, then immediately launches the Talent's follow-up attack against this target. With the Vengewise Bonus Ability, this Ultimate counts as a follow-up attack and benefits from Prey's 25% follow-up DMG amplification.
When Prey is on the field, Moze enters the Departed state. After allies attack Prey, Moze deals 1 instance of Lightning Additional DMG equal to 15% of his ATK and consumes 1 Charge point. For every 3 Charge points consumed, Moze launches a follow-up attack dealing Lightning DMG equal to 80% of his ATK. When Charge reaches 0, Prey is dispelled and the tally resets.
After using Technique, enters Stealth for 20 seconds. While in Stealth, Moze is undetectable by enemies. If Moze attacks an enemy from Stealth to enter combat, increases DMG by 30% for 2 turns. A strong opener that gives an easy early-combat damage buff at no additional cost.
Build Targets
Best Light Cones


Best Relics
Best Teams for Moze
Moze functions as a Sub-DPS in follow-up attack teams. The enemy marked by Prey needs to be attacked repeatedly by allies to trigger his follow-up attacks. The more your team attacks, the more Moze deals damage off-turn.


.png)


Now make the pull happen.