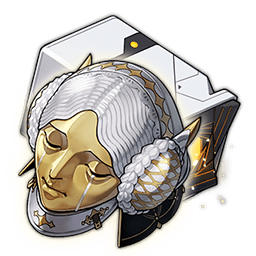
Best Light Cone
Memories of the Past
Best Relic Set
Messenger 4pc
Planar Set
Broken Keel
Key Mechanic
Speed Tuning
Best Partner

Skills

Basic Arrowslinger

Deals Imaginary DMG equal to 100% of Yukong's ATK to a single enemy. Low priority for actively pressing unless the Talent enhancement is available, but still restores a Skill Point.

100% of ATK
Skill Emboldening Salvo

Obtains 2 stacks of Roaring Bowstrings (up to 2). While active, all allies' ATK increases by 80%. Each ally turn after Yukong's ends consumes 1 stack. The stack is not consumed on the turn Yukong gains it by using this Skill, giving her window to use Ultimate immediately after.

80% ATK buff
Ultimate Diving Kestrel

Costs 130 Energy. Deals Imaginary DMG equal to 380% of ATK to a single enemy. If Roaring Bowstrings is active when this Ultimate fires, additionally increases all allies' CRIT Rate by 28% and CRIT DMG by 65%. These buffs stack on top of the existing ATK bonus from the Skill.

380% of ATK
Talent Seven Layers, One Arrow

Every other turn, Yukong's Basic ATK becomes enhanced, dealing an additional 80% ATK as Imaginary DMG and increasing the Toughness-Reducing DMG of that attack by 100%. This gives Yukong exceptional Weakness Break contribution for a Harmony unit while still generating a Skill Point.

+80% bonus DMG
Technique Chasing the Wind

After using the Technique, Yukong enters Sprint mode for 20 seconds, increasing her Movement SPD by 35%. When she initiates combat by attacking enemies in Sprint mode, she gains 2 stacks of Roaring Bowstrings immediately, enabling buff uptime from turn one of the fight.

+35% move speed

Build Targets

Relic Main Stats
Head
HP (fixed)
Hands
ATK (fixed)
Body
CRIT Rate
or CRIT DMG
Feet
Speed
or ATK%
Planar Sphere
Imaginary DMG
or ATK%
Link Rope
Energy Regen
or ATK%
Stat Targets
HP3700 - 4500+
DEF700 - 1300+
Speed1-2 slower than sustain
Energy Regen19.44%+
Effect RES30%+ (Broken Keel)
Substat Priority
01
Speed tune before DPS
02
HP% / DEF% survivability
03
Effect RES 30% for Keel
04
ATK% improves her DMG
Skill Upgrade Order
Skill
1st
Ult
2nd
Talent
3rd
Basic
Last
Skill first because Roaring Bowstrings ATK% scales with level. Ultimate second for the CRIT buffs it adds. Talent equal to Basic since the enhanced Basic contributes meaningful Toughness damage and team DPS.

Best Light Cones

#1
Memories of the Past
Memories of the Past (S5)
Best general-use option for Yukong. At S5 it grants 56% Break Effect and regenerates 8 Energy per attack, especially potent given Yukong hits frequently with her enhanced Basic. Only surpassed by specialist options for break-heavy builds.
top pick
#2
But the Battle Isn't Over
But the Battle Isn't Over (S1)
Top alternative. Provides Energy Regen Rate and regenerates a Skill Point when using Ultimate on an ally. The 30–50% DMG bonus granted to the next ally taking action is a strong buff if Yukong's Skill directly precedes the main DPS's turn.
5-star alternative
#3
Meshing Cogs
Meshing Cogs (S5)
Strongest free energy-generation cone in the game. At S5 regenerates 8 Energy per attack or when hit. Especially useful in encounters with high enemy attack frequency. Sacrifices all supportive secondaries for pure energy uptime.
f2p best
#4
Planetary Rendezvous
Planetary Rendezvous (S5)
Specialist pick for Imaginary team compositions. Grants all Imaginary allies 24% more DMG at S5. Only relevant in double-Imaginary or triple-Imaginary lineups, but extremely efficient in those contexts.
specialist

Best Relics

Cavern Sets
1
Messenger Traversing Hackerspace
Best-in-slot cavern set for Yukong. The 2-piece bonus provides 6% SPD. The 4-piece bonus grants all allies 12% SPD for 1 turn when Yukong uses her Ultimate on an ally, powerful for speed-tuned teams. This set directly enables and rewards the precise action order management that Yukong demands.
4-piece top pick
2
Sacerdos' Relived Ordeal
Sacerdos' Relived Ordeal (2pc) + Messenger (2pc)
Flexible 2+2 setup. Sacerdos' Relived Ordeal provides a useful 2-piece bonus that can further buff allies. Mixing 2-piece sets is a strong option if well-rolled pieces are available across both sets.
2+2 mix
3
Knight of Purity Palace
Knight of Purity Palace (2pc) + Messenger (2pc)
Alternative 2+2 that adds a DEF bonus for additional survivability on Yukong. A reasonable pick if you need Yukong to stay alive in particularly dangerous fights.
2+2 mix
Planar Ornament Sets
1
Broken Keel
Broken Keel
Top planar choice for Yukong. Provides 10% Effect RES and when Effect RES reaches 30% or higher, grants all allies 10% CRIT DMG. Stacks directly onto the CRIT DMG Yukong already provides through her Ultimate buff, making this excellent for CRIT-scaling DPS partners.
2-piece best pick
2
Fleet of the Ageless
Strong alternative for ATK-scaling teams. Provides 12% Max HP and, when Yukong reaches 120+ SPD, grants all allies 8% ATK. Pairs well with the ATK% boost already provided by Roaring Bowstrings.
2-piece
3
Penacony, Land of the Dreams
Viable in Imaginary teams. Provides 5% Energy Regen Rate and 10% DMG to all allies sharing the same damage type as Yukong. Both bonuses are useful, but only in same-element team compositions.
2-piece
4
Lushaka, the Sunken Seas
Great option when supporting a single ATK-scaling DPS who is first in the team lineup. Provides 5% Energy Regen Rate and boosts ATK of the first character in lineup by 12%. The Energy Regen helps Yukong maintain Ultimate uptime to keep CRIT buffs rolling.
2-piece

Best Teams for Yukong

Yukong's buffs require careful speed tuning; she must act immediately before her main DPS to guarantee both ATK and CRIT buffs land on the same turn. Teams built around slower DPS units like Imbibitor Lunae are far more forgiving.

01 · Imbibitor Lunae Core Her strongest and most forgiving pairing
Yukong
Yukong
Harmony / Buffer
Imbibitor Lunae
Main DPS
Tingyun
Energy Support
Luocha
Sustain
Imbibitor Lunae's slower action economy makes speed tuning Yukong's buffs far more manageable. Tingyun provides energy regeneration to keep Imbibitor Lunae's Ultimate flowing. Luocha sustains without needing explicit healing turns, preserving Yukong's action slot.
02 · Imaginary Synergy A4 Bowmaster team
Yukong
Yukong
Harmony / Buffer
Welt
Imaginary DPS
Silver Wolf
DEF Shred
Fu Xuan
Shield / Sustain
Yukong's A4 Bowmaster trace increases Imaginary DMG by 12% for all allies while she's alive. Welt benefits from the full buff package: ATK, CRIT Rate, CRIT DMG, and Imaginary DMG bonus. Silver Wolf adds DEF shred for amplified burst windows.
03 · F2P · Budget Accessible characters only
Yukong
Yukong
Harmony / Buffer
Dan Heng
Main DPS
Asta
SPD / ATK Buffer
Natasha
Healer
A fully free-to-play friendly composition. Yukong provides the heavy ATK and CRIT buffs while Asta adds SPD and further ATK. Dan Heng benefits from the CRIT boosts during his single-target windows. Natasha keeps the team alive without requiring limited characters.
ZERO ADS · ZERO MARKUP
You did the research.
Now make the pull happen.
This site doesn't run banner ads, pop-up ads, or paid placements that compromise the rankings. The only way we earn anything is if you top up through our LDshop link: same price as the in-game shop, instant delivery, and it directly supports every tier list update going forward.
Top Up Oneiric Shards on LDshop
Instant delivery · Trusted platform · Every purchase supports HSRTIERLIST.COM

Eidolons

E 1
Aerial Marshal
At the start of battle, increases the SPD of all allies by 10% for 2 turns. A notable quality-of-life improvement that can influence the action order in the opening turns, helping Yukong line up her buff windows right from the start.
Useful Opener
E 2
Skyward Command
When any ally's current energy equals their energy limit, Yukong regenerates an additional 5 Energy. This effect can only trigger once per ally per cycle, and the trigger count resets after Yukong uses her Ultimate. Meaningful energy sustain in teams where allies cycle through their Ultimates frequently.
Energy QoL
E 3
Torrential Fusillade
Skill level +2 (max 15) and Basic ATK level +1 (max 10). The Skill level upgrade directly boosts the ATK buff applied to allies via Roaring Bowstrings, making this a meaningful DPS increase for the whole team.
Solid Upgrade
E 4
Zephyrean Echoes
When Roaring Bowstrings is active, Yukong deals 30% more DMG to enemies. This significantly boosts her personal damage output, especially her Ultimate hit, during the windows when her buffs are up, which should be most of the fight with good play.
Personal DMG Boost
E 5
August Deadshot
Ultimate level +2 (max 15) and Talent level +2 (max 15). The Ultimate level increase boosts the CRIT Rate and CRIT DMG values she adds to allies, as well as her own Ultimate hit damage. Talent upgrade improves the enhanced Basic ATK bonus damage.
Incremental
E 6
Bowstring Thunderclap
When Yukong uses her Ultimate, she immediately gains 1 stack of Roaring Bowstrings. This is an extremely impactful quality-of-life improvement: it means using the Ultimate no longer risks losing the buff window entirely if you had only 1 stack remaining, and it helps maintain Roaring Bowstrings more consistently across longer fights.
Major QoL

Major Traces

Archerion
Ascension 2
Yukong can resist 1 debuff application for 1 time. This effect can be triggered again in 2 turns. Provides protection against crowd-control effects like Imprisonment that could desync Yukong from her intended action order and ruin carefully planned buff windows.
Bowmaster
Ascension 4
While Yukong is on the field, Imaginary DMG dealt by all allies increases by 12%. A passive team-wide buff that is always active and never requires skill usage to maintain. Makes Yukong an excellent companion for any Imaginary-element damage dealer, including herself.
Majestas
Ascension 6
When Roaring Bowstrings is active, Yukong regenerates 2 additional Energy every time an ally takes action. Note that this applies to actions (including Ultimates and Extra Actions) not just turns. This trace is critical for maintaining consistent Ultimate uptime and is a major reason why Yukong can keep her 130-cost Ultimate cycling reliably.
+10%
ATK
+22.4%
Imaginary DMG
+18%
Max HP

Upgrade Materials

Artifex's Module / Cogwheel / Gyreheart
Character Ascension
Harmonic Tune
Trace Material
Golden Crown of the Past Shadow
Boss Drop
Destroyer's Final Road
Weekly Boss Drop

Frequently Asked Questions

Yukong's Roaring Bowstrings buff only lasts 2 stacks and loses 1 stack on each ally turn after hers. This means in a 4-person team, one ally will almost never receive the buff unless Yukong acts immediately before that specific ally every cycle. Achieving consistent buff application requires precise speed tuning, team-specific planning, and in-combat awareness of action order shifts caused by debuffs, turn advances, and extra actions.
Using Yukong's Skill gives her 2 stacks of Roaring Bowstrings. While any stacks remain, all allies' ATK increases by 80%. Each time an ally's turn ends (after Yukong's turn in the same cycle), 1 stack is consumed. On the same turn Yukong uses her Skill, no stacks are consumed. If she uses her Ultimate on that same turn while Roaring Bowstrings is active, the Ultimate also adds 28% CRIT Rate and 65% CRIT DMG on top of the ATK buff.
Yukong is a 4-star character obtainable on the standard banner, so she is accessible to all players. However, she requires more skill and investment to play effectively than most other 4-star supports. For players without Imbibitor Lunae or another slow Imaginary DPS, the buff timing challenge is much harder. She can still work well in casual content even without perfect speed tuning, but realizing her full potential demands significant effort.
Yukong should run 1 to 2 Speed slower than her main sustain character to act just before the DPS in the rotation. Since optimal speed varies by team, there is no universal target. The recommended guideline from the build data is to aim for 1–2 Speed slower than the sustain, ensuring Yukong consistently acts before her primary DPS while the sustain can react after. Prioritize Speed on the Feet relic slot and Speed substats over everything else when building her.
Yes, but it is harder. Imbibitor Lunae's slower action economy makes landing Yukong's buffs on his turns much easier due to his lower base SPD and Skill Point consumption patterns. With faster or more erratic DPS units, maintaining buff alignment becomes significantly more challenging. Yukong can still contribute meaningfully in those teams, especially via her Imaginary DMG passive, her Toughness-break output, and her own Ultimate damage, but the buff efficiency will be lower without tight speed tuning.
E6 is the most impactful: it prevents the buff from collapsing when you use the Ultimate by immediately restoring 1 stack of Roaring Bowstrings, a major quality-of-life improvement. E1 provides useful SPD at battle start. E4 boosts her personal damage significantly. However, because Yukong is a 4-star, her eidolons are obtainable from the standard banner and standard warp over time. If you are already pulling on the standard pool, they are nice pickups. Spending targeted resources on E1 or higher is harder to justify given her B-tier status in the current meta.
Top Up · Support Us
Oneiric Shard
Zero ads · Save more
Top Up Oneiric Shards Up to 30% Off
Why pay full price in-game? Get Oneiric Shards cheaper on LDShop: same shards, delivered in minutes. No login details needed, just your UID.
GET CHEAPER SHARDS
4.9★ Trustpilot · Instant Delivery