A cyborg cowboy Galaxy Ranger drifting among the stars. Boothill is an entirely Break-focused single-target DPS who forces enemies into a Standoff and unleashes devastating Pocket Trickshot Break DMG that ignores most conventional damage scaling, making him uniquely powerful against any enemy he can Weakness Break.
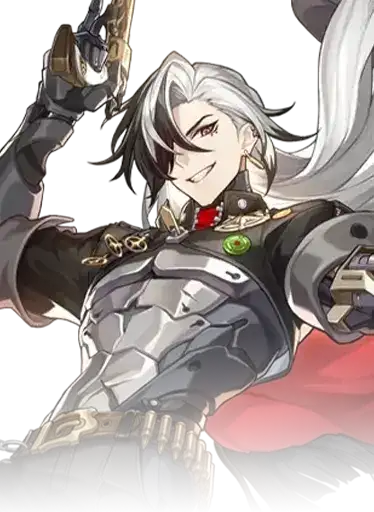
Boothill
Galaxy Ranger / Space CowboySkills
Deals Physical DMG equal to 100% of Boothill's ATK to a single target. While outside Standoff this is his only attack option, but during Standoff it is replaced by the Enhanced version. Low priority to level.
Active during Standoff. Deals Physical DMG equal to 220% of ATK to the enemy in Standoff. Restores 30 Energy and deals 60 Toughness damage (same as a Skill). Cannot recover Skill Points and can only target the Standoff enemy. This is Boothill's primary damage tool every turn.
Forces Boothill and a target into Standoff for 2 of Boothill's turns. The enemy is Taunted and receives up to 30% more DMG from Boothill. When the target is Weakness Broken or defeated, Boothill gains 1 stack of Pocket Trickshot and Standoff ends. Does not consume SP, does not regenerate Energy, and does not end his turn. Acts as a free extra action.
Costs 115 Energy. Applies Physical Weakness to the target for 2 turns (guaranteed, no Effect Hit Rate needed). Deals Physical DMG equal to 400% ATK and delays the target's action by 40%. This Weakness Implant lets Boothill brute-force any enemy that does not lock their Toughness bar, regardless of their natural weaknesses.
Each Pocket Trickshot stack increases the Enhanced Basic's Toughness Reduction by 50% (up to +150% at 3 stacks, for 150 total Toughness damage). If the target is Weakness Broken during the Enhanced Basic, Boothill deals Break DMG equal to 70% / 120% / 170% of his Physical Break DMG based on stack count. This is his core damage engine. Pocket Trickshot carries over between battles.
After using the Technique, the first Skill cast in the next battle applies the same Physical Weakness as the Ultimate to the target, lasting 2 turns. Lets Boothill start Break-ramping immediately even before he has his Ultimate available, useful against non-Physical weak enemies.
Build Targets
Best Light Cones


Best Relics


Best Teams for Boothill
Boothill's Break-centric kit pairs best with supports that provide Break Effect, Weakness Break Efficiency, and action economy. Fugue is currently his best partner, enabling multiple Pocket Trickshot stacks in a single action. Ruan Mei provides universal Break support that benefits his entire rotation.


Now make the pull happen.